
I have created this quick guide to help people to improve the visual quality of their filmed learning materials (or video calls). For many of us this is the first time that we will be filming videos and won’t have encountered any of these issues before. But I hope this guide will point you in the right direction.
Camera Angles
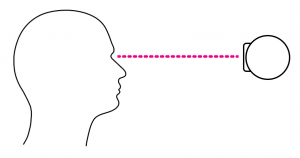
Whenever filming you should try to keep your camera at eye-level, this is almost universally accepted. There a number of reasons for this, firstly it’s the most flattering angle, but there is also an accessibility reason as students who may be hard of hearing will find lip-reading easier from this angle.
However, this isn’t as easy as it sounds. You’re table/desk will be lower than your eye level, which means the camera built into top of your laptop screen will probably be at chest height. Some laptops even put the camera lower than that (including the Dell XPS 13’s famous nostril-cam). To address this you should consider raising your laptop up, a stack of books or a laptop raiser stand (such as this one) can help you here.
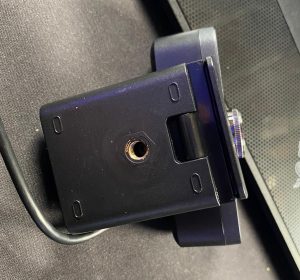
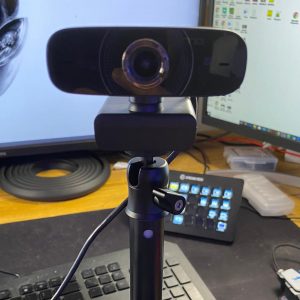
If you are using a desktop PC with an external camera, you may have the opposite problem with the camera actually being too high. One solution is to put your webcam on a tripod. Most webcams these days have a standard 1/4″ tripod screw on the base, this means that you can screw them onto almost any standard tripod. I use a combined tripod and selfie stick (like this one) because it is highly portable, and perfect for use on a desk. It also comes with a universal mobile phone clamp for whenever I want to film with my phone.
What Camera?
Many people will have multiple camera options. Beyond your webcam you may have a mobile phone or a personal camera. So which should you use to film your learning materials? I personally have a few personal cameras (I have an Sony A7iii and a Sony A5100) and an iPhone in addition to my webcam. I set three up, and filmed a short video side by side on a tripod rig.
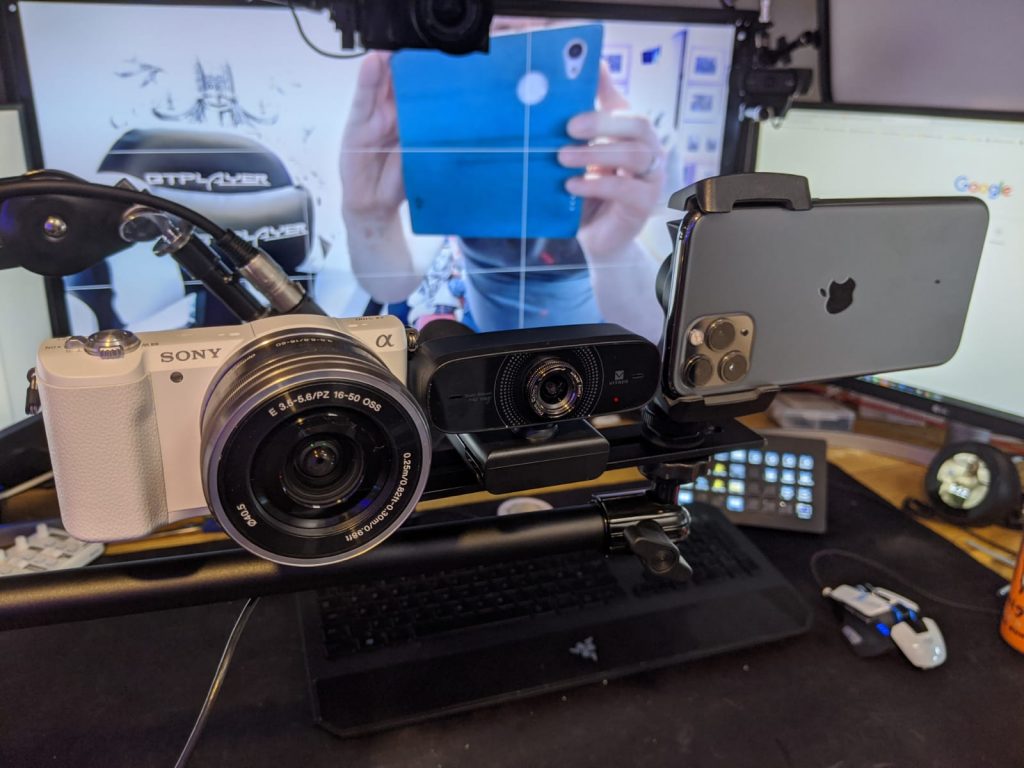
In the video I tried to compare some key quality areas. Notably the ability for the camera to follow rapid motion (waving), maintain focus on a moving presenter, colour, and focus range. I used these because I already owned them and they were quickly available. I chose not to use my A7iii (my main camera) because it is a very expensive and specialised option, by comparison the A5100 is a very popular camera and many people own something similar. The iPhone 11 is also expensive if you were to buy it, but many people have them included in their contracts. The webcam cost £40 on amazon a few months ago, it was a “generic” and simply advertised as “HD webcam”.
As you can see from the video, the colour for the iPhone and the A5100 is both very good, while the webcam is quite desaturated. I’m not saying that one colour profile is better than the other, but I personally prefer the richer colour range of the iPhone and the A5100. The focus for the three is very similar, but the A5100 is slightly better, and maintains a sharper image throughout. However, a big advantage that the iPhone has is that it is highly portable allowing you to film anywhere (you also always take your phone everywhere with you).
If you do have a mirrorless camera that you want to use as a webcam you will need to find a way to connect it. Some cameras (a number of Cannon cameras) have built-in software to allow you to do this, however many don’t. If you want to use your camera as a webcam it will need a HDMI output, and you will need something called a “capture device” to take that HDMI feed and use it as a webcam. The cheapest capture device available is the elgato camlink. If you plug any HDMI feed (including a games console for example) into this device it will show up on your computer as a webcam. There is a great video on how to use the camlink with a Sony mirrorless camera below. However, the same setup will work with many hand-held cameras as long as they have a HDMI output.
Lighting
Lighting is has probably the single highest impact on the quality of your video. Beyond helping you to look “camera ready” lighting can actually impact the focus and filming speed of many webcams this is due to the exposure. Exposure is basically how long the camera needs to take in light for to capture the scene. As we can’t manually control the shutter speed on webcams, good lighting is especially important. A longer exposure allows it to collect more light, meaning that it can still display images in a dark scene. However, a longer exposure (by its nature) takes more time, which can reduce the frame rate of your camera, making your movements look jittery.
to light my scene I use two LED soft-lights. These are fantastic because they allow me to control the temperature (colours from yellow to white) and brightness of my lighting. I bought a couple of reasonably inexpensive panels from amazon, namely the rechargeable Raleno LED panels. I bought these because I also wanted to use them with personal projects where controlling the light was very important. But you can get equally good quality from natural light, or a standard desk lamp.
The key consideration with lighting is angle. Always make sure your primary light source is facing you, and ideally behind the camera. For example, if you sit with a window behind you your light can flood the camera making the scene look really dark.
In the following two photos I have changed the orientation of my lighting. In one photo I have turned my LED light towards the camera, and in the other I have turned it towards me. Although this is a rather extreme example I hope it illustrates the impact of lighting angles on cameras. Specifically, when the light faces the camera, everything (excluding the light) goes very dark. However when the light is facing away from the camera the scene is appropriately lit.
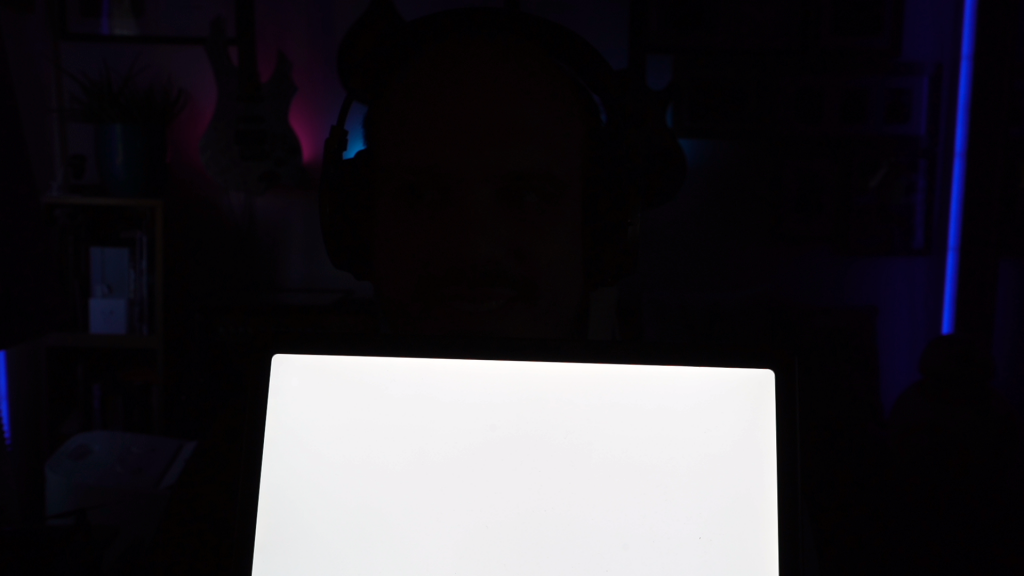
Remember that your screen/monitor can also be a powerful light source. Many monitors are extremely bright! Remember that too much light pointed at your face can lead to over exposure, especially on webcams! For example, in the following picture I kept my LED light the same, but turned up the brightness on my monitors (I have a 3 monitor setup) which made me look like Casper the friendly Yorkshireman.
The eagle-eyed among you will notice that I’ve changed to a different camera – this is because my main camera (a Mirrorless Sony A7iii) is actually very hard to overexpose. However, my Logitech C920 (the worlds most popular webcam) over exposes surprisingly easily – something to keep in mind if you have the option.
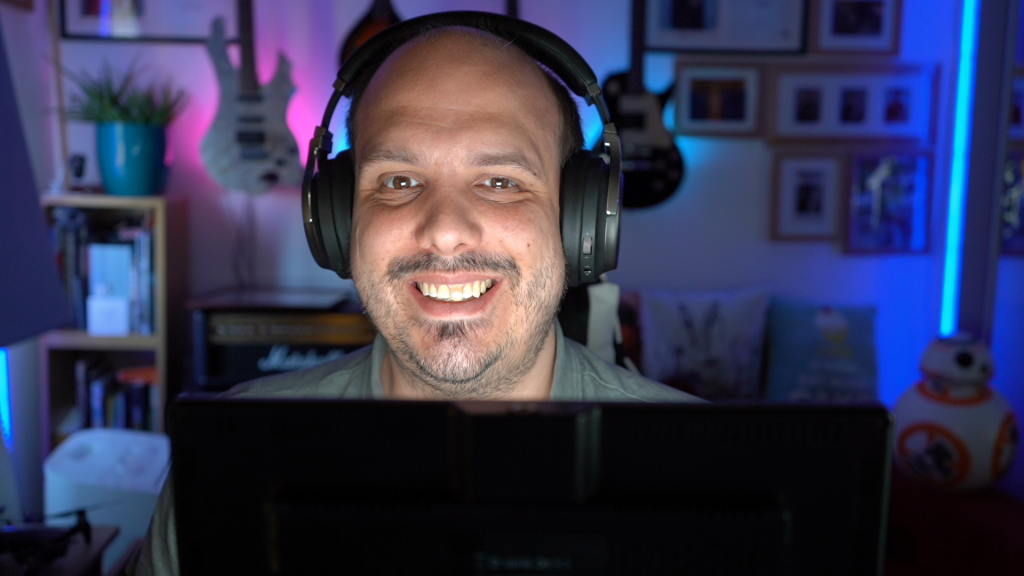
If you (like me) choose to use a lighting solution rather than natural light, you can also be a little bit more creative with your angles and how you light your face. It is generally more flattering to have the light slightly higher pointing down. Don’t have the light below you pointing up (as I do with my pictures here – for illustration) as this looks like you are about to tell a ghost story.
Background
Backgrounds have been discussed extensively with relation to this topic, and opinions are split with regards to how to present your background. Many people prefer to present against a plain wall, and others don’t like people being able to look inside their house. Personally I prefer just a well-presented background as it adds something to the aesthetics. So I would normally advise people to just film wherever they are comfortable, as long as their background is tidy/appropriate.
Personally I use some inexpensive coloured bulbs and LED strips to throw colour onto the wall behind me. I do this because it helps me to stand out as the subject, and just “looks nice”. This is a common approach taken by professional YouTube creators and LiveStreaming stars.
If you are uncomfortable about your background, many software solutions (including Skype and Teams) now allow you to blur your background, or replace it entirely. There are recording solutions (some of which come free with a webcam) that will allow you to do this too. If you want to take this approach, sitting in front of a plain wall with flat lighting can help the algorithm do the job accurately. I would also suggest sitting relatively still as the software is trying to do this replacement in real-time and quick movements can confuse it (sometimes causing people to lose an arm or half their face). Green-screens (chroma key) is also an option, but I could do an entire blog post about that – if people find this post useful.
Editing Video
Windows used to come with its own powerful little video editor called “movie maker”. Alas, Microsoft retired the project several years ago. Fortunately, there are a number of excellent free options for video editing.
The most fully featured of these is Blender (actually a 3D animation and modding package) which has some great video editing tools. It allows you to cut, splice, and mask, making it perfect for most tasks you will want to do while creating an educational resource. I have included a video which talks you through the basics of how to edit in Blender.
The downside of Blender is that it can tricky to learn, but once you are up to speed you can do most tasks you would want to do.
I would also recommend DaVinchi resolve which is a professional piece of software that has a feature-packed free version. I only came across this recently (after a colleague recommended it) but it is fairly easy to use, and has a lot of extremely professional features.
I hope you have found this blog useful. Let me know what you are currently using, and if you would like me to go into any further detail on specific areas.
4 Responses
A very useful blog, thank you!
This is a timely and very useful post. Thank you for sharing your tips.
That’s very helpful! Thanks!!
[…] Faraz on Filming Learning Materials […]