After publishing my post about how to film learning materials I had a number of people say “what about audio”. I had always planned to do a second article about improving sound quality, but I was surprised that there was so much interest. So, I thought “I’ll quickly write something up”… four thousand words, a new mic bought, and several audio tracks recorded, later and I had written this post! Ooops. I’m starting to think I should have split this out over a few posts.
Ah well…. here is my “short” guide to improving the audio in your learning materials. Enjoy!
As a quick note – in this article I have tried to describe everything you can do for free to improve your audio. However, after a certain point to get better sound means investing in your system (a mic upgrade for example). I felt that I needed to include that as it is an honest reality. However, I firmly believe that people shouldn’t be paying for their own hardware just to do their jobs – and I am honestly not encouraging people to start buying their own hardware. So, please take the later advice in this article in the spirit that it is intended, optional, and aimed at people who may have an interest in upgrading for their own reasons.
Reduce background noise
The first thing you need to do to improve audio is reduce background noise. Closing windows, (and curtains) to reduce traffic noise can be an instant win. But also think about where your mic is placed, items such as fans in the room, or the kettle can really distract from your audio. If you are recording near the kitchen, vibrating appliances (such as the dishwasher and tumble dryer) can also create vibration noise in your mic (more about this later).
Your computer itself can also be a significant source of background noise. The cooling fans on your computer can cause a low hum, which makes your audio feed sound grimy. To reduce this, make sure your computer isn’t working harder than it needs to, close down any background applications or anything that could be drawing significant computation or memory (web browsers can be a surprising nuisance here).
Finally, consider where you are recording. Empty rooms (which many home offices are) with bare walls can echo terribly. Adding wall furnishings such pictures, bookshelves, and wall hangings can reduce echoes by disrupting the flat surfaces – book cases can be especially good at this. If you have an especially echoey space try hanging some clothes from your wardrobe on the walls and the backs of doors. Or if you have a wardrobe in the room, try opening the door – the heavy fabrics can help dampen the echos. Putting rugs on hard floors can also help here.
Don’t move around and get close to your mic
The further away from your mic, the higher the gain will need to be (more about this later). A high gain can distort your voice, but will also cause your mic to pick up more background noise. So (if possible) get as close to your microphone as possible. However, if you are using the mic built into your laptop you may not be able to do this – especially if you are also using the built-in camera to record video.
Also, try and maintain a consistent distance from your microphone. The further away you are from the mic, the quieter you will sound – alternatively your software may automatically adjust your mic gain which can sound very strange. So try to keep a consistent distance from your microphone.
Use headphones
If you have headphones available, I recommend you use them instead of using any built in speakers. Headphones can help you to avoid audio-feedback, specifically your mic picking up output from your speakers. Everyone has been in a teleconference when someone is getting feedback and it can be really distracting.
Some headphones will also come with a built in mic, which can be a significant upgrade on the one built into your laptop. For example, the microphone built into standard apple headphones that come with an iPhone are surprisingly good.
Upgrade your microphone
There comes a point where there is relatively little you can do to improve your audio without upgrading your microphone. The one built into your webcam or laptop will only go so far – just look at the size of a professional microphone, and compare it to the size of your webcam. There just isn’t the space to squeeze anything of any quality in there.
Through this section I will be demonstrating various microphones. For each recording I had a fan on (to create some background noise – because sometimes you just can’t avoid it) and I tried to talk at the same relative volume. I didn’t add anything additional to the microphone (such as a pop shield) to try and keep the demonstrations as fair as possible. To start out I have created a short recording using the built-in microphone on my Logitech webcam, which is very similar to the mic you may have built into your laptop.
In this recording you can clearly hear the fan in the background, and the audio has a slight echo. It doesn’t sound particularly good quality, and this would probably be distracting if used in learning materials.
One category of microphone which I’ll discuss, but refuse to buy, so can’t do a recording is a gooseneck microphone. For anyone who remembers computing in the 90’s, gooseneck microphones were very popular (and the first example of a desktop mic aimed at the computing market). A gooseneck microphone takes your standard laptop-style mic and puts it on the end of a bendy arm. It sounds awful, looks hideous, and costs more than a good quality microphone – I have yet to find one that records nice audio so I can’t recommend them.
Following gooseneck microphones we have headset mics, these are microphones built into your headphones. A headset microphone has two key advantages. Firstly, they put the microphone very close to your mouth, meaning that you can set the gain very low (reducing background noise). Secondly, they are attached to your head so you can move around freely which isn’t possible with the other microphones.
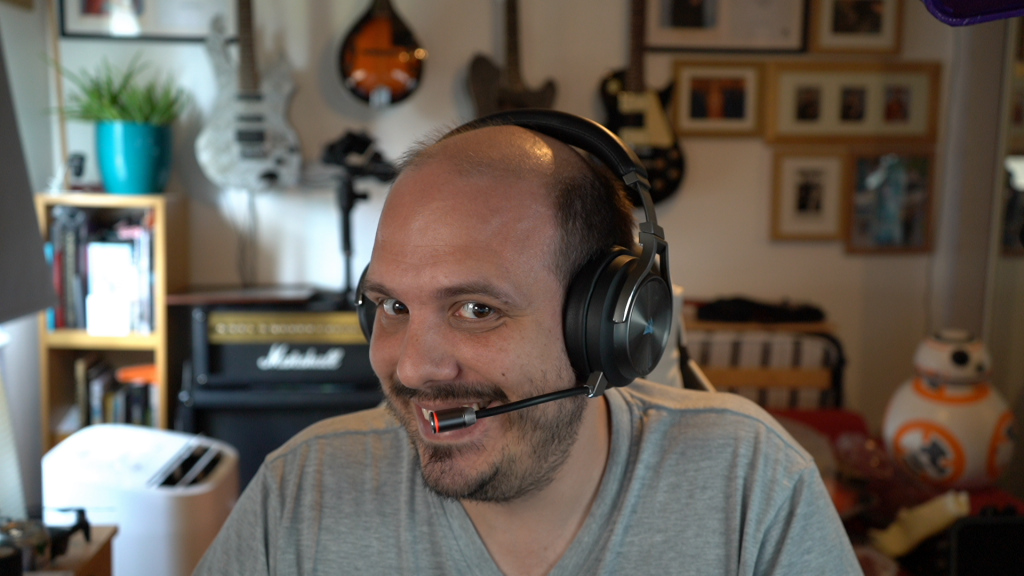
My headset is also wireless – which is great for meetings. I can switch off my camera, and stay in a call while walking around the house or changing my son’s nappy – an no one ever knows… shhhhh.
However, the actual quality of the microphone isn’t particularly great. It is still a tiny capsule similar to what your laptop my have built in by default. It will be a little bit more directional, and a little closer to your mouth – but the audio still won’t be the cleanest.
The next class of microphone is the Lavalier, or the lapel microphone. These share many of the same qualities as the headset mic, in that they are small, and can be placed quite close to your mouth.
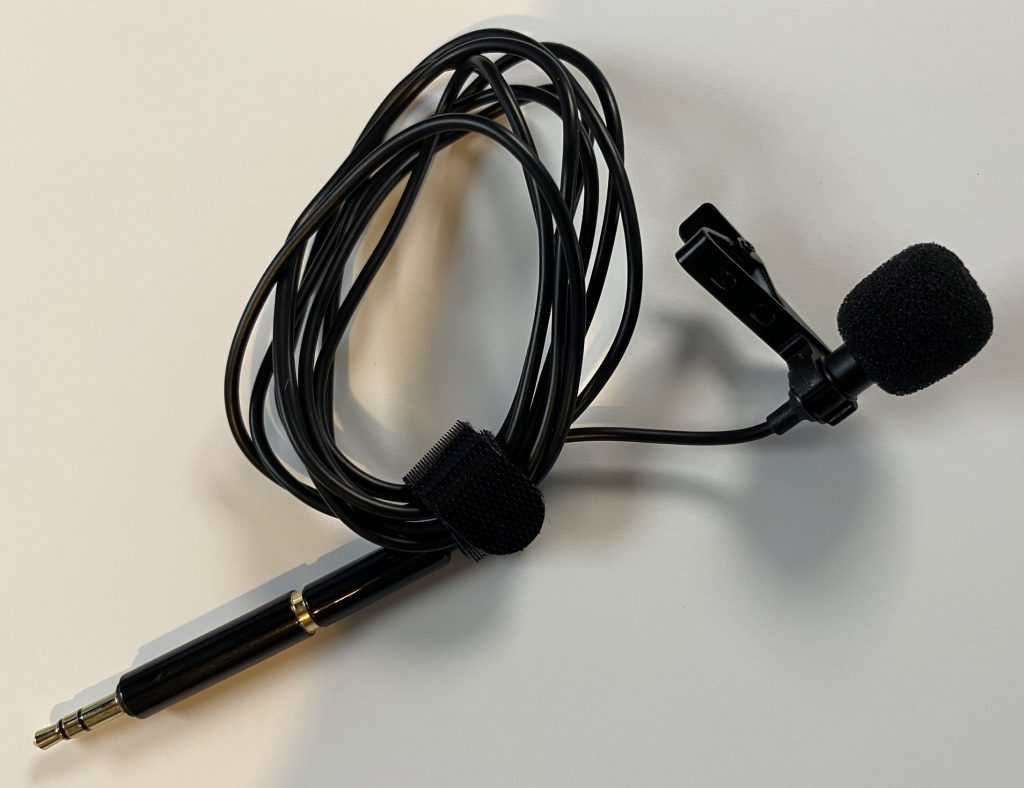
These microphones are great for interviews as they can effectively isolate individual speakers. I have used these pretty extensively when recording panel interviews. However, many require a preamp or professional audio equipment to make them work effectively.
I have never had much success using a lavalier with my computer recording setup, and I tend to keep them for specialist applications. However, there are now USB versions which are apparently very good including this one available for £17 on amazon. The big advantage of this type of mic is that you can hide it relatively well.
However, if you really want to get great audio in your recordings you will probably want something a bit more robust. One possible option you should consider is a USB Microphone. Arguably the most popular of these is the Blue Yeti.
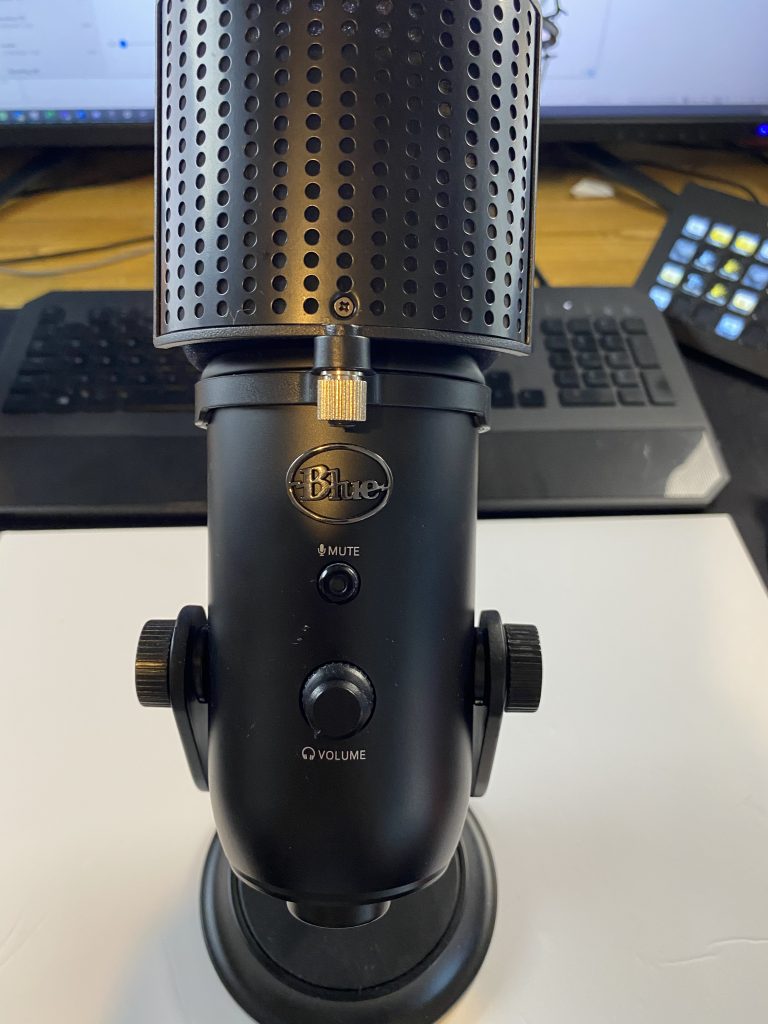
I’ve owned Blue mic’s for a few years, and they have worked really well. However, they are quite expensive, the Yeti (pictured above) is £120, and the cheaper version (the Snowball – which I also own) is £59. The Yeti also looks worryingly like an equine suppository, but I’m probably the only person who is bothered by that.
The audio quality is pretty good, and this is the favoured mic of many well-known YouTubers. It is also a really versatile mic, as you can vary the polar pattern, more about this later!
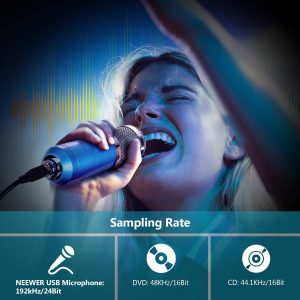
However, most people won’t want to spend £120 on a new mic, so I tried to find a cheaper option of a similar audio quality. Neewer had this cardioid condenser available for £29 which came with a shock-mount (more about these later) and a foam pop shield. It didn’t come with a stand unfortunately, but I found a cheap desktop mic stand for £9. So, everything together this microphone cost £89 less than the Blue Yeti.

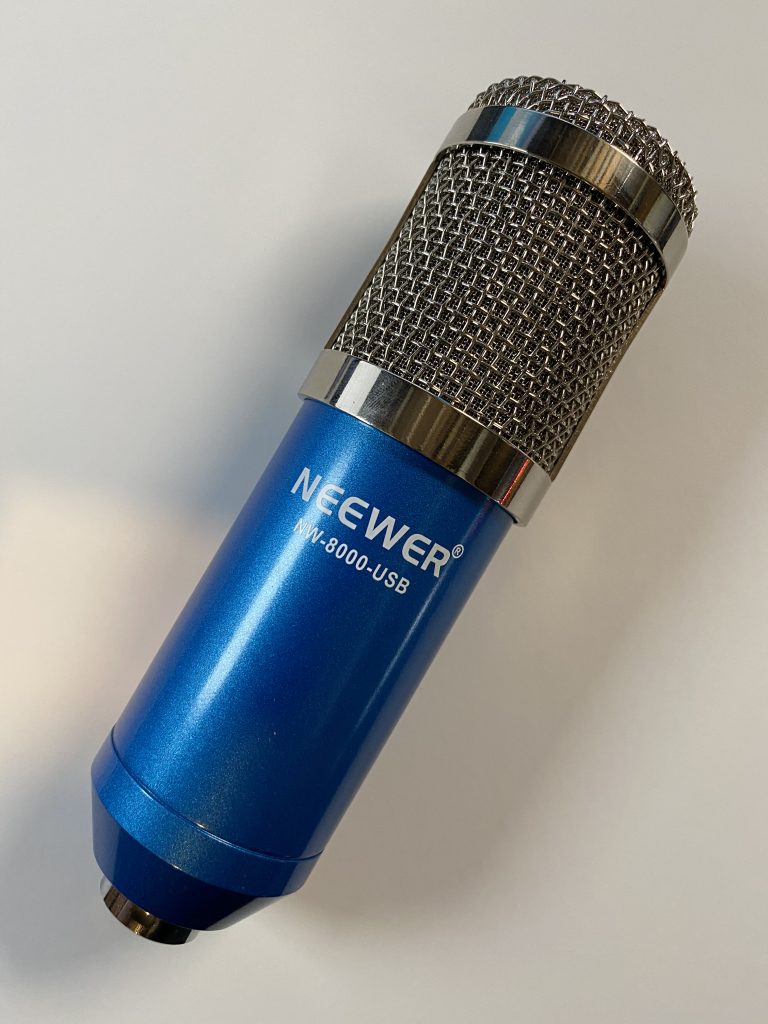
While this microphone misses out on some of the features of the Blue Yeti, such as gain control or polar pattern selection, the reality is that most people won’t make use of these features anyway. But, honestly, I think the audio quality of this budget-friendly microphone is actually better than the Yeti. Certainly it picked up significantly less background noise, and the quality just sounds a little smoother.
If you are really interested in your audio quality you may want to consider XLR microphones. XLR refers to the standardised XLR connection used extensively in audio engineering. Going for an XLR setup gives you a huge range of microphone choices, polar patterns (more about this later in this article) and professional-end audio hardware. However, and XLR setup will be expensive, as in addition to your microphone you will need a pre-amp or USB mixer (as you can’t plug an XLR mic directly into your computer). Furthemore, in reality you may find the quality improvements minimal compared to a good USB microphone.
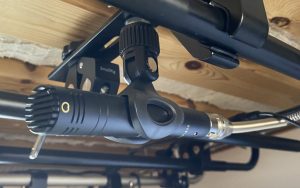
For an example look at my default setup. I use a Sure SM7B dynamic microphone which costs almost £400, it doesn’t come with a stand so I use a £100 Rode PSA1 boom arm, the mic is plugged into a RodeCaster mixer and preamp which costs about £500. So close to £1000 to record my audio.
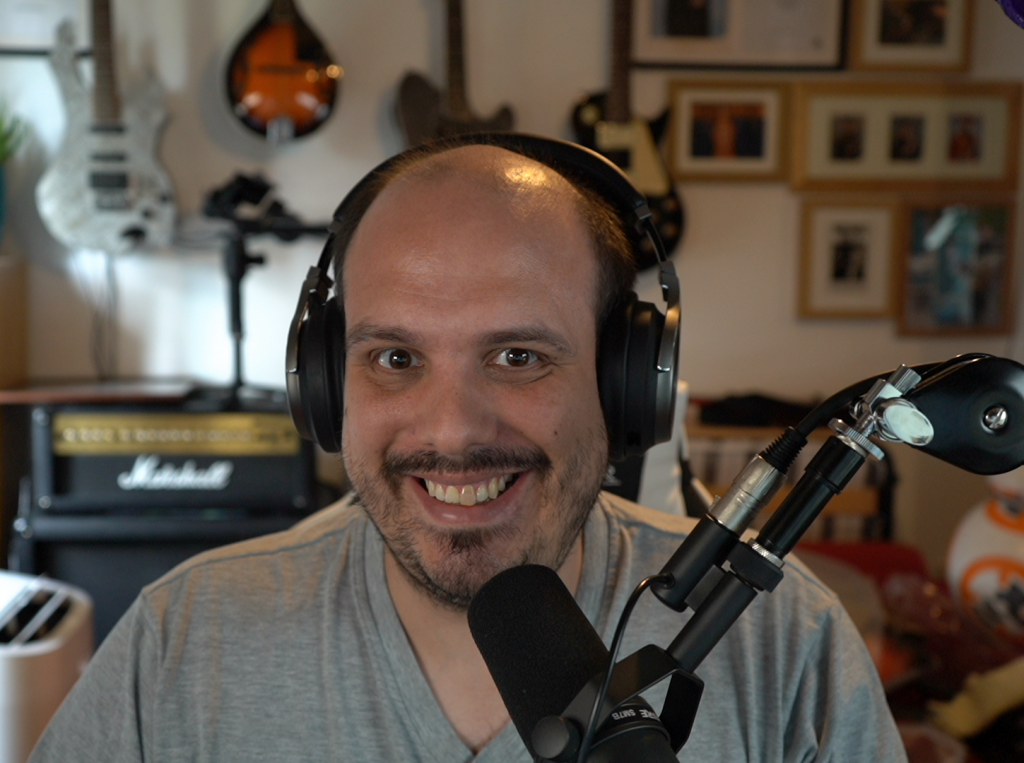
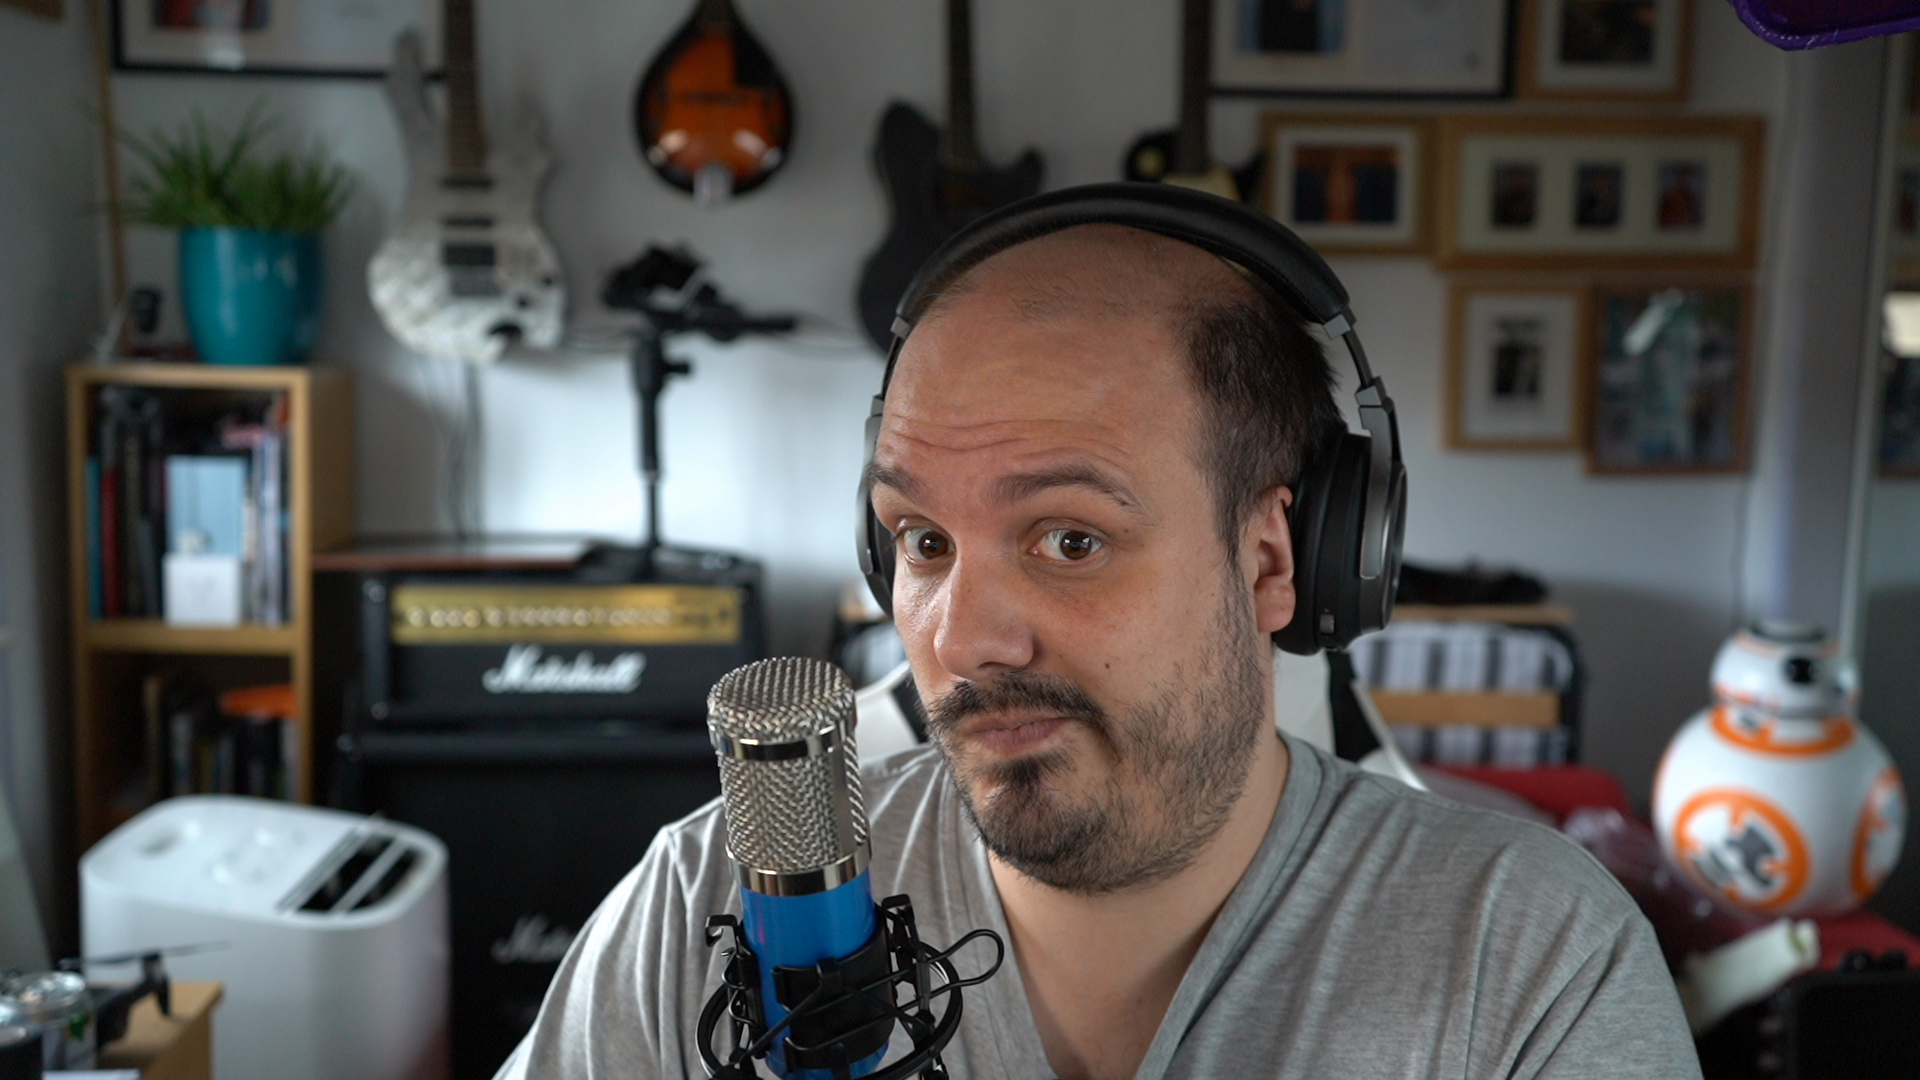
Which is really expensive, and a little excessive for learning materials, so you may be asking me why I went for this setup. The truth is that I love my SM7B, it is a super directional mic, cuts out loads of background noise, has a wide frequency range, and it has built in shock isolation. It is a favourite of rock singers, podcasters, and radio DJ’s – is is the definition of a “legendary” microphone, with a place in the audio hall of fame right next to the beautifully versatile SM57. I also bought this because I have a lot of personal audio-driven projects including a regular live-stream and an upcoming Student Engagement podcast (more about this later).
I also wanted a system where I could mix various mic inputs, because I play guitar (and wanted to record some songs for my baby), and I use my room in various ways which sometimes facilitates me using different microphones. For example, I sometimes do video calls from my office couch (in the background of my office photos) and for this, I want to quickly switch to my top-mounted cardioid condensers which are less directional and better “room mics”.
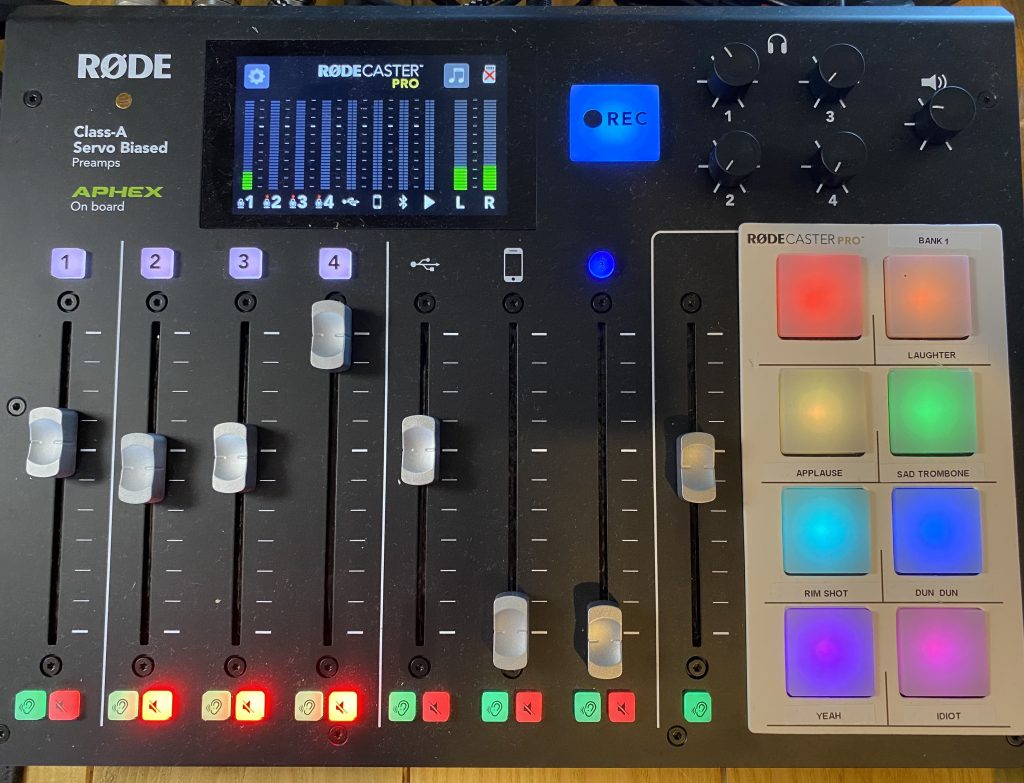
So I built my setup to be as versatile as possible and for me personally that justified the cost of an XLR setup. The RodeCaster also has a built-in soundboard, meaning I can interrupt video-meetings with such joyful sounds as “Applause”, “Sad Trombone”, and “Fart Noise”.
So… to make a long story very short! if you want to make a dramatic improvement to your audio quality, consider upgrading your microphone. However, unless you have personal reason for wanting a specific setup, save yourself some money and buy a cheap USB microphone. I can recommend the Neewer USB mic I have tested as part of this article. Its genuinely excellent, and to most people will be comparable to my expensive home setup.
Understand the pattern of your microphone
The most important consideration when considering how to setup your microphone is understanding the polar pattern. The polar pattern describes the sensitivity of the mic, based on the direction that sound comes from. Put simply, the mic will often “hear” better from certain directions.
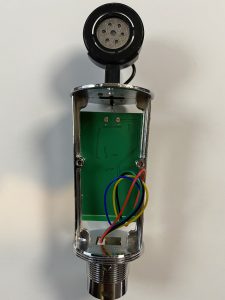
However, to understand the polar patten you need to the direction of the capsule. The capsule is the part of the microphone that actually captures the sound. Now, when you usually think of microphones you will probably have an image in your mind of someone singing, and they will usually be holding the tip of the microphone towards their mouth… however, this isn’t the way that most desktop microphones are designed.
For example, consider the Neewer microphone I tested earlier in this post. I took it apart, and when I do that you can clearly see that the capsule (the round part that looks like a car tire) is actually facing towards the side of the microphone, meaning this is the way you should talk to it. Talking (or singing) to the top of the mic is going to sound awful! However, it doesn’t help that in the promotional photos for the mic, that is exactly what the model is doing!.
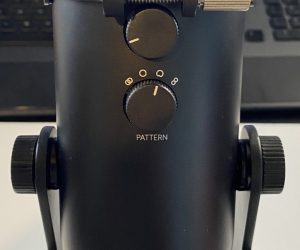
Most microphones will tell you on the box or in the manual which direction the capsule faces. However, as a general rule of thumb, if the mic has a spherical grille head (the kind of microphone you may use in karaoke) the capsule probably faces the tip. If the grill of the microphone is more cylindrical with the grille extending down the side of the mic, the capsule probably faces outwards to the side – with this type of mic, the logo will normally face the person talking to the mic. These are general rules and don’t apply to all mics, so please read the instructions. Some microphones (such as my blue Yeti) will allow you to change the pattern.
Once you know the direction of the capsule you can use the polar pattern to your advantage. There are many different polar patterns, designed to suit every recording application, however, most desktop microphones will either be Cardioid, Omnidirectional, or (occasionally) Bidirectional.
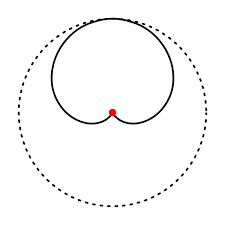
The Cardioid pattern is so named because it looks like a heart, personally I think it looks like a butt, but the “buttoid pattern” doesn’t sound nearly as professional. In this pattern the mic is most sensitive directly in-front of it. It will pick up a some sound from the side, but very little from directly behind it. This is why it id absolutely vital to know which part of your mic is the “front”. The Cardioid pattern is the one you will most commonly find on desktop microphones, and is the best “generalist” microphone pattern for most recording situations.

The second most common microphone pattern is Omnidirectional. In the omnidirectional pattern the microphone is equally sensitive from all directions. This unfortunately means that it they often pick up the most background noise. This is probably the microphone you already have built into your laptop. However, despite the issue with background noise there are some reasons you may want to use an omni.
For example, most levalier microphones are omnidirectional. This allows them to be clipped anywhere on the speakers lapel or collar and still pickup their voice. However, because they are so close to the audio source their sensitivity (gain) can be set very low reducing the impact of background noise. You may also want to use an omnidirectional mic if you want to record multiple people sat around a table. For this reason, most teleconferencing microphones are omnidirectional.
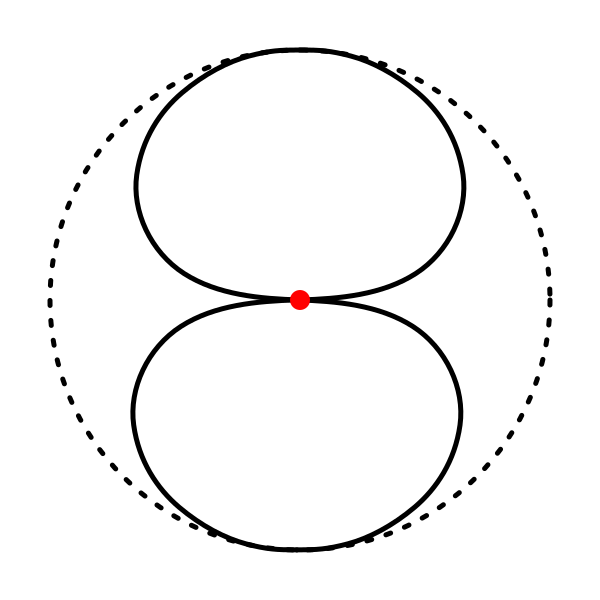
The bidirectional pattern is rare by default, but a number of USB mics have this as a selectable option – most notably the Blue Yeti has this pattern available. A bidirectional mic is equally sensitive front and back meaning it won’t just pick up the person in-front of the mic, but also any noise directly behind it.
This kind of mic/pattern isn’t great for general usage, but, it is ideal for recording two people (a podcast interview for example). In this very specific application the bidirectional patten can be really useful. However, most people wanting to record interviews this way will opt for 2 cardioid microphones instead as this offers more flexibility, and allows you to isolate individual audio sources.
Gain
Microphone gain refers to how the how the amplitude of the microphone has been boosted between the source signal and the output. Basically, it refers to the signal strength of the microphone – and by association how much noise it will pick up.
Crudely, the gain can be considered as the microphones volume, range, and sensitivity – how well it “hears” the world around it. This is best explained with two examples. Firstly imagine someone keeping a fixed distance from the microphone and talking at a fixed volume. If you increase the gain then the person will sound louder. Secondly, imagine a noise source further away from the microphone. With the mic gain low, you can’t hear the audio source, but as you turn the gain up, you may be able to hear the noise through the mic. However, a higher gain can also introduce distortion.
For this reason, when you record audio for learning materials you want to get as close to the mic as possible, with the gain as low as possible. This is the best way to reduce the influence of background noise. However, when getting close to your mic you need to be mindful of plosives (which are discussed in the next section).
Most recording software (including Microsoft Teams, and Skype) gives you the option to adjust the gain of your mic, some will even do this automatically for you – keeping your voice within a a set volume range. Some microphones will also have their own gain control built into the microphones pre-amp (the Blue Yeti for example). I tend to find that adjusting the gain on the mic is better than adjusting it through software (the audio stays cleaner) – but other mics may be different so you will want to play around with the settings until you find the best solution for your setup.
Plosives
A plosive is the sound made by a burst of breath during the sounding of certain consonants. To feel the effects of a plosive, put your hand in front of your mouth and sound the letters “A” and “T”. When you make the “T” sound you will probably feel a burst of air against your hand. This burst of air adds an audio artefact to your sound, characterised by a slight ‘Pa’, ‘Ba’, or ‘Fa’ sound. Honestly, plosives will make your audio really distracting.
Getting rid of them isn’t easy, and sound engineers have been trying to avoid plosives since the dawn of the recorded word! However, there are some things you can do, including “talking over” and using a pop-shield.
In the following video I have demonstrated the ‘talking over’ method. In this approach, you angle your microphone so that it is pointed at your mouth, but your voice (and those nuisance bursts of air) is going over the top of the microphone – reducing the risk of plosives. I have tried my best to demonstrate this using my Sure SM7B.
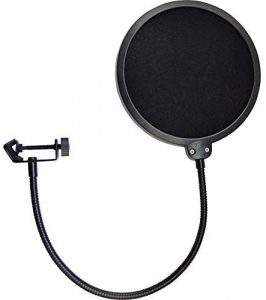
Another way to avoid plosives is to use a pop-shield. There are many different designs of pop shield, but as a general rule they consist of some kind of permeable barrier which allows sound through, but deflects or dampens the flow of air. The most common designs use either a foam or nylon shield on a gooseneck arm, allowing them to be attached to any microphone.
In the following two audio samples I have tried to highlight the benefit of pop shield. In the first example, I haven’t used a pop shield, in the second example I have – hopefully you can hear the difference. For comparison I have used the same Mic on both examples (the Neewer USB mic). I also built the pop shield, which I explain in more detail further down this section.
If you don’t want to buy a pop shield, and are feeling a bit thrifty you may be able to build your own DIY pop shield. There is a good chance you already have everything you need to make one at home.
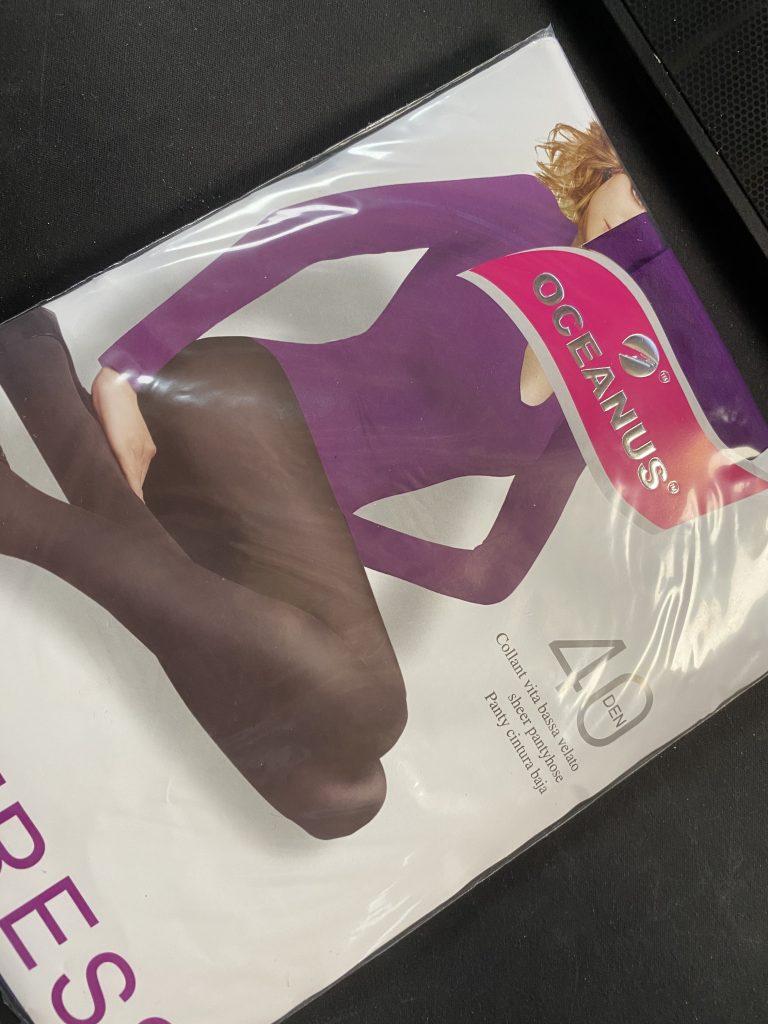
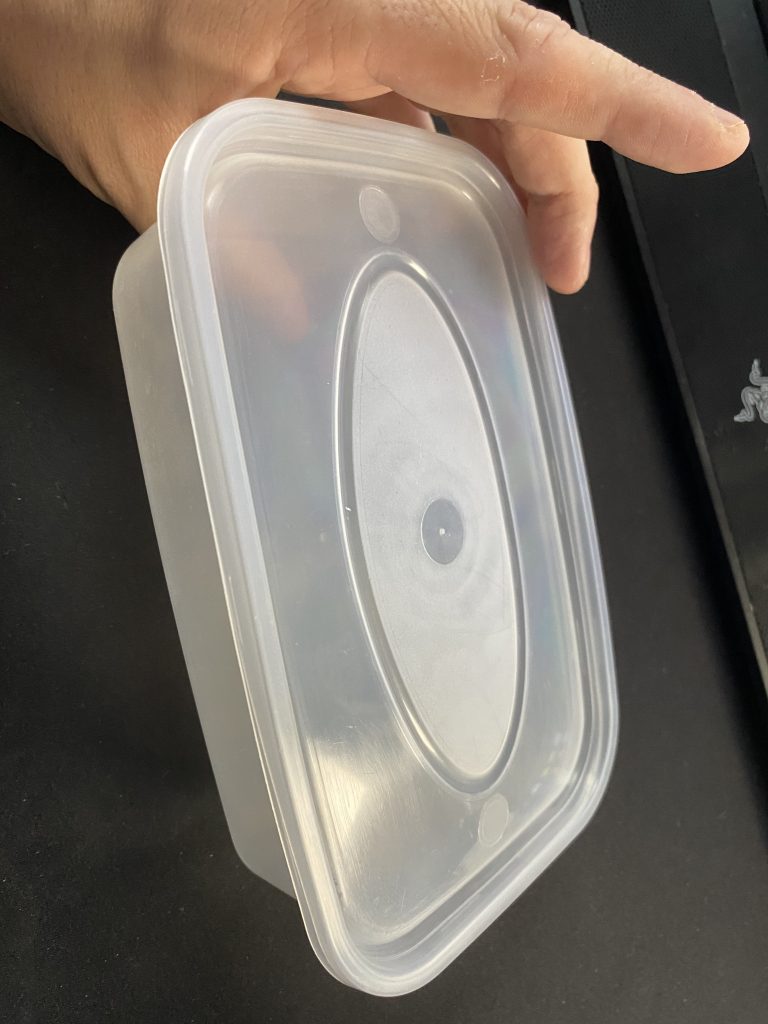
To build your own pop shield you will need 1) a pair of tights, 2) a takeaway tub, 3) some garden wire. I have detailed the steps below and included photos to help you build your own.
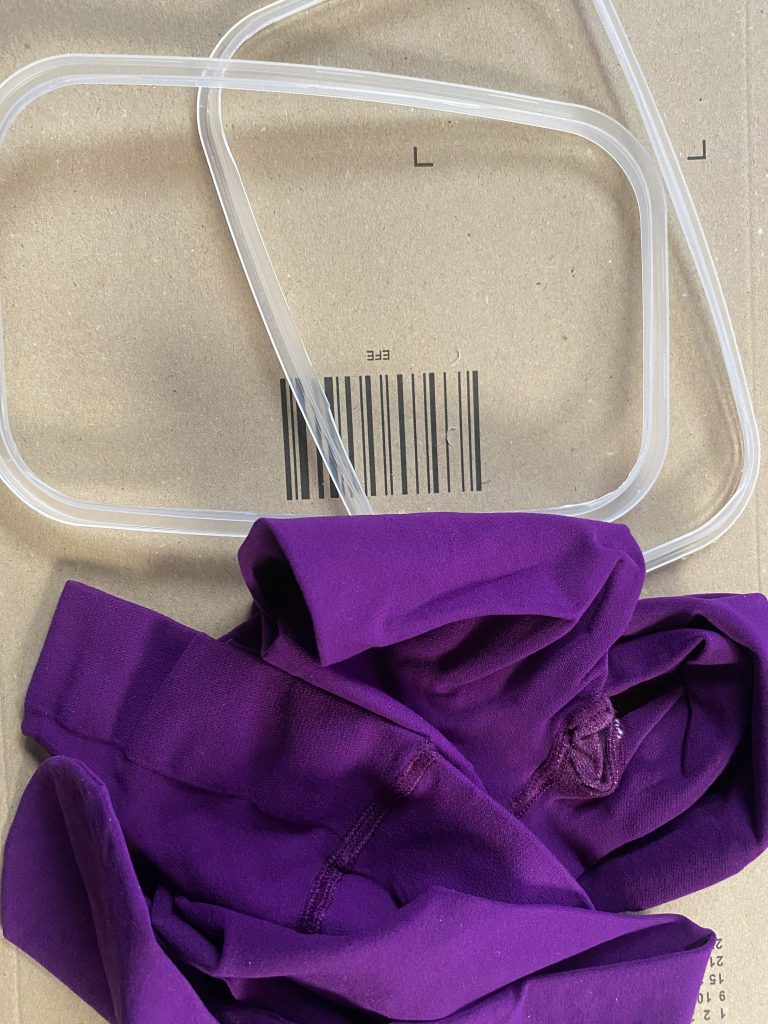
- Get an old (or cheap) pair of nylon tights, and a takeaway tub.
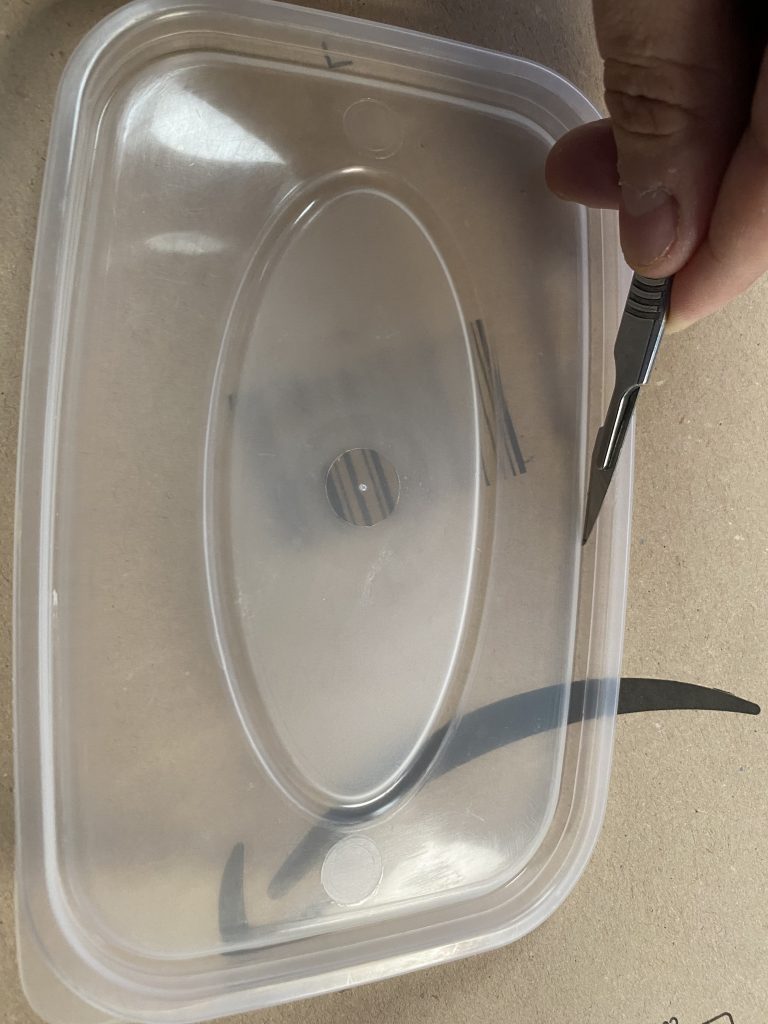
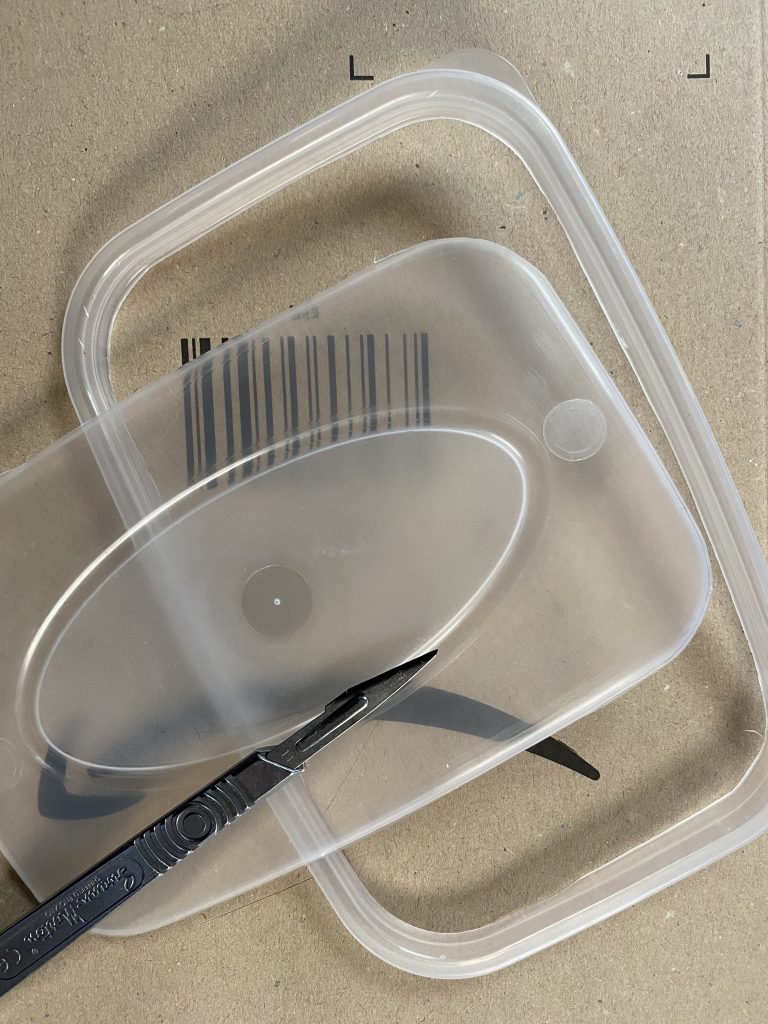
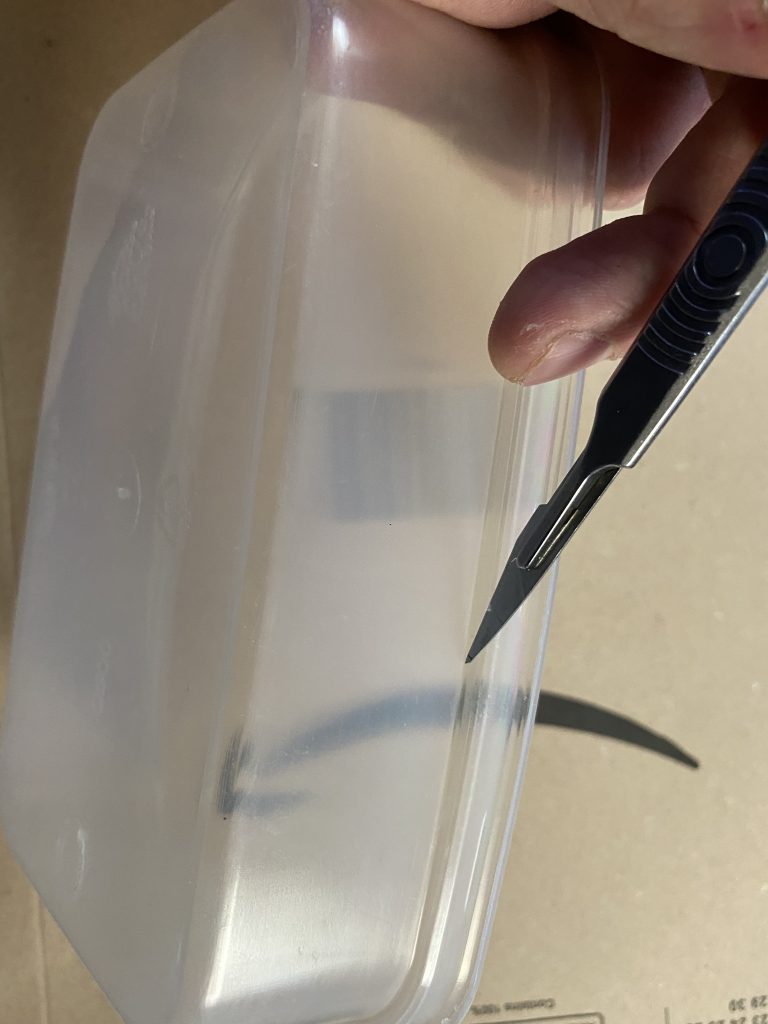
- Using a sharp knife, cut out the center of the takeaway tub lid, and cut off the lip of the tub. You should be left with two plastic hoops that can clip together. (recycle the rest of the tub)
- Cut a section from one of the legs of your tights, the section must be big enough to cover your plastic hoop.
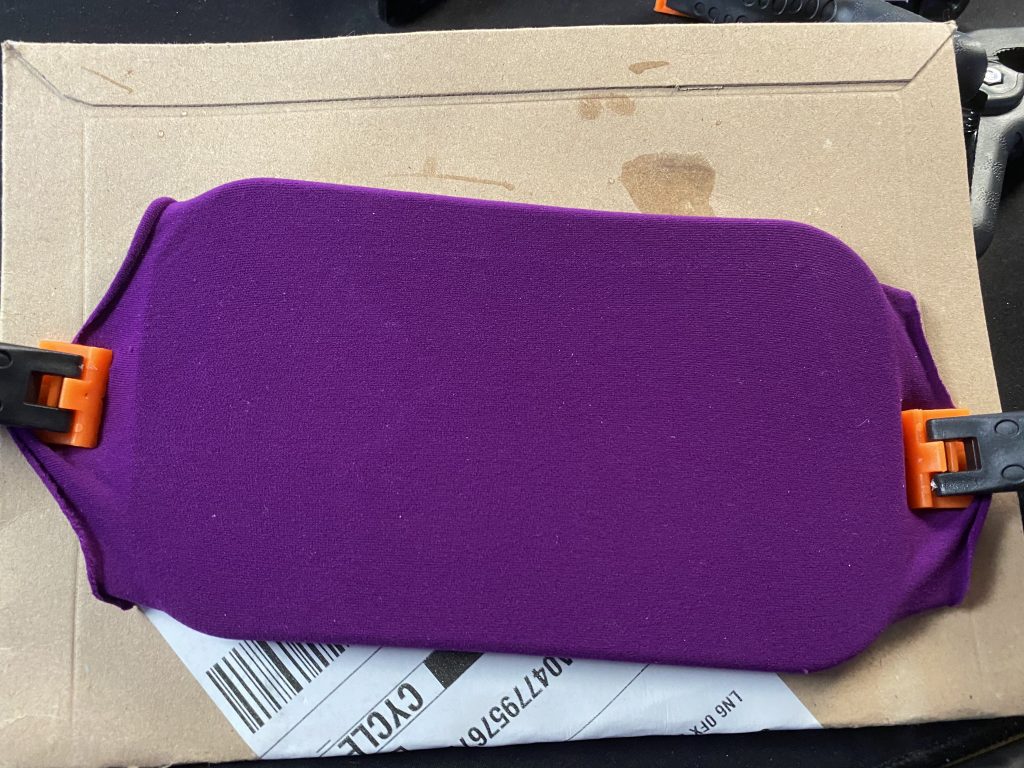
- Stretch out the section of tight and slide the tub-hoop underneath.
- Put some spots of superglue on the inside of the lid-hoop and line it up with the tub-hoop under the tights. Carefully snap the two together sandwiching the nylon between.
- Optional – I ran a ring of (purple) gaffer tape around the edge to help it hold together while the glue dried.
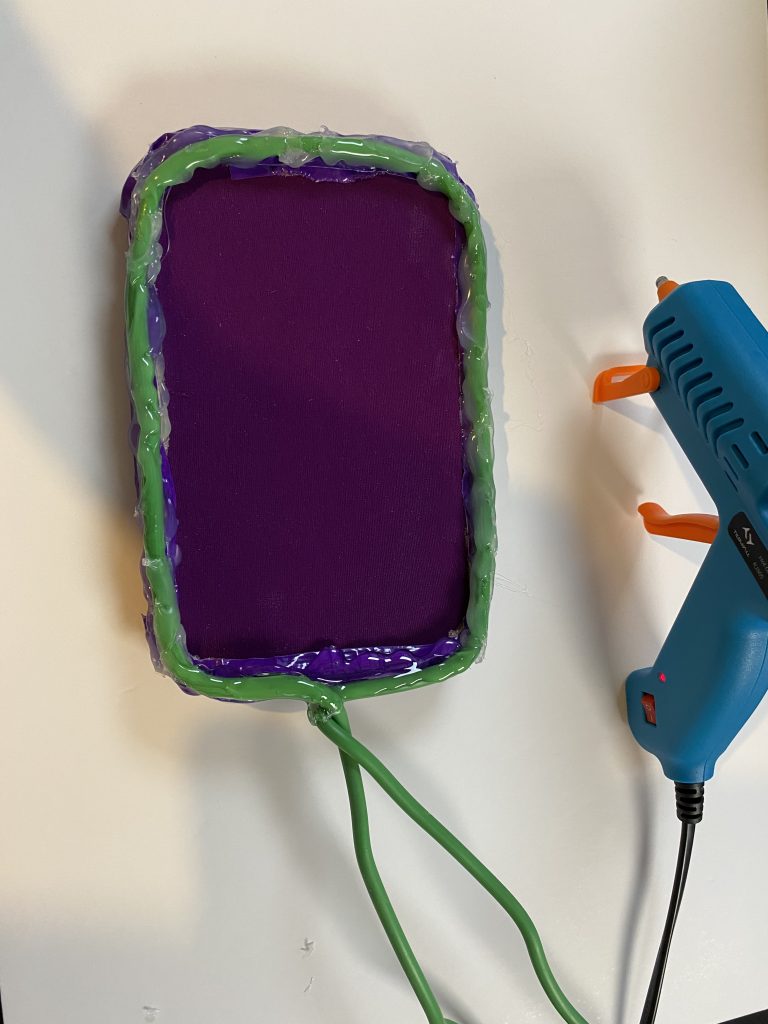
- Cut a length of garden wire and glue it around the ring. I used hot glue, but superglue or epoxy would work just as well.
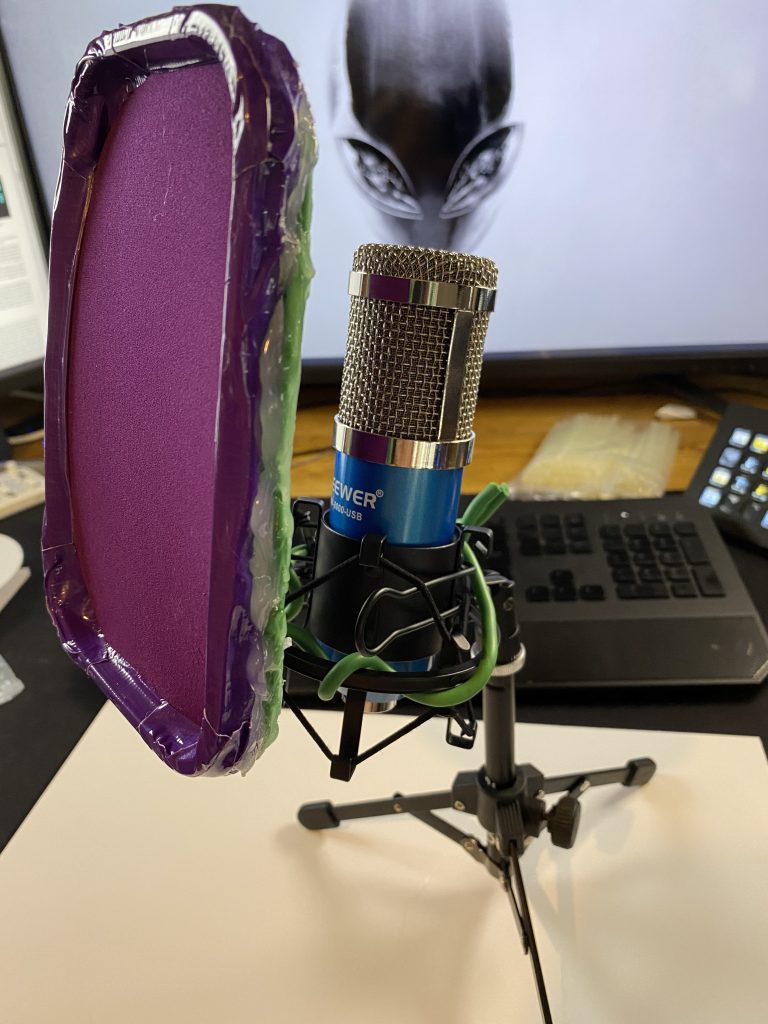
- Once the glue has dried you can use this wire to attach it to your mic of choice.
Bump and shock noise
As a final point, something else that can disrupt your audio is bump and shock noise. Microphones pick up sound in the form of vibrations, however they will also pick up other forms of vibrations – if you (or your dog) accidentally bumps into the desk for example.
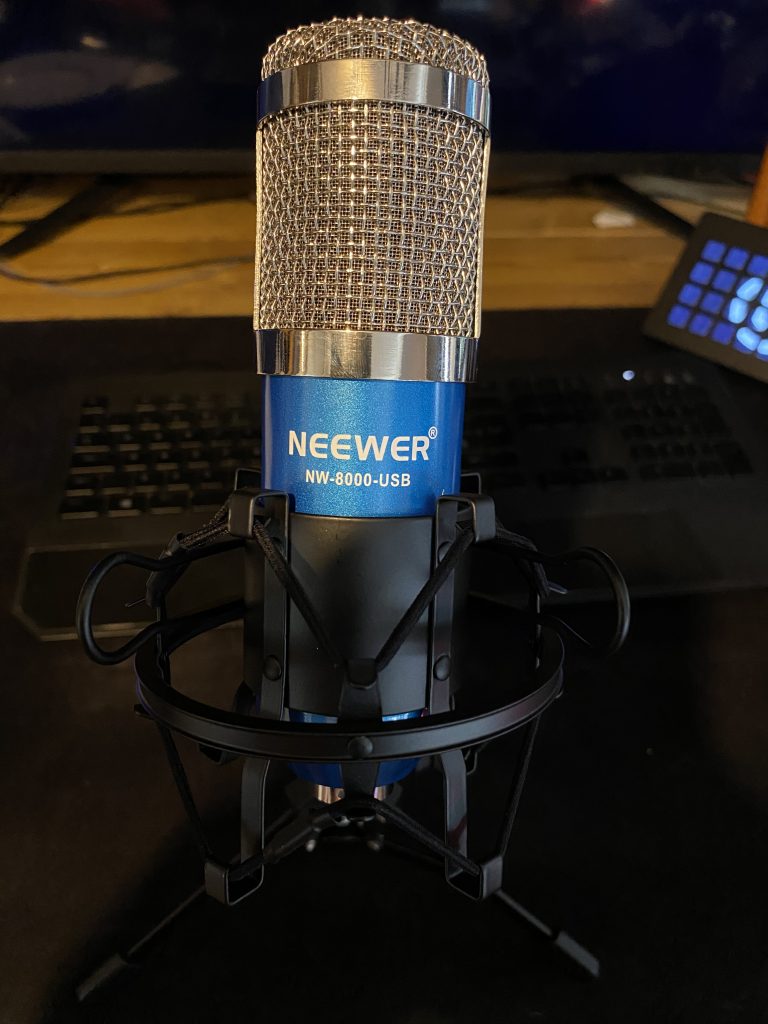
Many USB microphones (including the budget-conscious Neewer) come with a shock mount, which is basically a suspension system for your microphone which helps to isolate them from bump noise. To further isolate, you could consider a boom arm for which there are a range options available (I really like the Rode PSA1) such as this £20 option which comes with a shock mount.
If you are happy with your laptop’s built in microphone, then you can buy laptop stands with built-in shock protection. However, these are quite expensive, don’t waste your money!
Conclusion
I hope you find this “short” guide helpful. Please let me know in the comments if there is anything you would like me to cover in more detail. I’d love to hear what your audio plans are for next years teaching!
7 Responses
Very useful information and a well made blog as always.
Cheers Mohammed!
What I like so much about your posts are that they are jam packed full of information but presented in a way that is easily understandable. I am learning so much!
Thanks Sue 🙂 trying to make these as useful as possible. Hope they can be helpful to someone!
Great article, Chris. Now that you’ve covered audio and video, I’d be interested to know more about how you combine these together. How do you position the camera and mic so that you’re following your advice of being close the the mic, whilst making sure it’s not visible in shot? Would be great to hear more about your setup to achieve this.
Hi Garry, most of the time I use my boom mic. It gives me a slight “radio DJ”
vibe so I don’t mind it being in shot. Though, if you are using a desk mic and you are keeping your camera at the eye-line you can usually have the mic about 30 cm away without it being in shot. Also perfect distance for talking over the mic.
[…] Chris on Improving the Audio in your Learning Materials […]